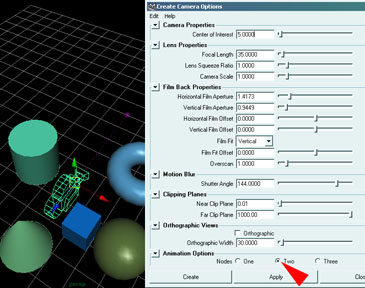
1) Create a Camera
- Menu Create > Camera ![]()
- Scroll down and chose "Two Nodes", this will create a camera
with a target point
- You can give the camera a unique name in the channels box
2) Create an Curve
- Create a curve, preferably an EP curve, because it
is easier to
control the shape than with the CV curve.
- Menu Create > EP Curve ... set the points in the workspace and
terminate with hitting the "Q" key or selecting
![]() .
.
or
- Create a circle
- Menu Create > NURBS Primitives > Circle
- scale and move the circle.
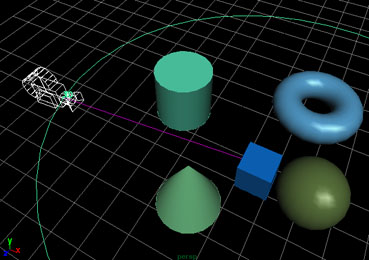
3) Attach Camera to Path
Camera and/or target point can be animated along a path
- switch to the Animation mode
- Select the camera or its target point
- Shift-select the curve
- Menu Animate > Paths > Attach to Path
by default the length of the camera animation will be
the time
set in the time slider, other values can be entered in the
"Attach to Path" Dialog box.
4) Look through the Camera
- View Menu > Panels > Perspective > "your
camera"
- click the play button to see the animated view
