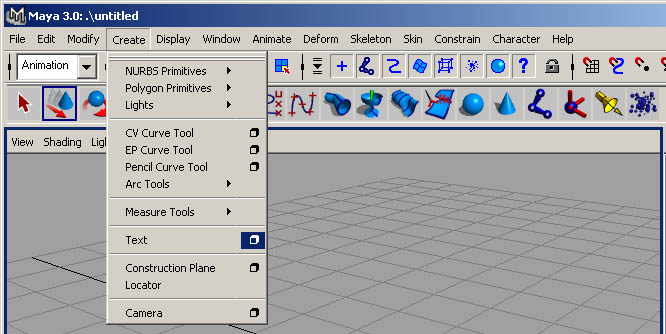
1) Create a Simple 3D Text in MAYA
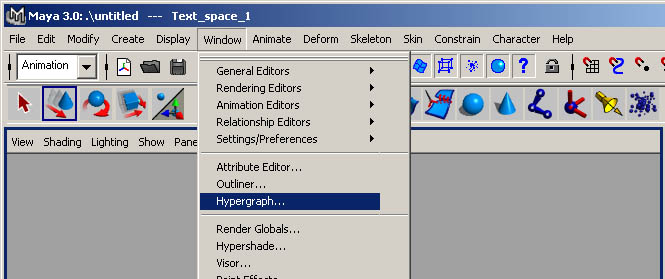
- Choose the Text Menu
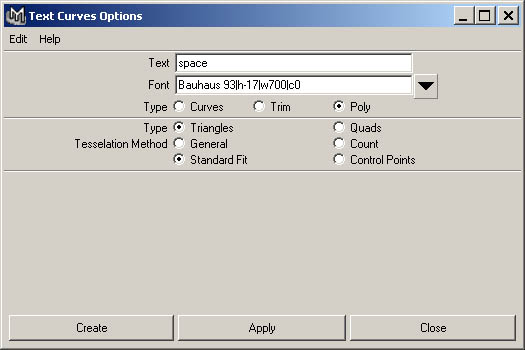
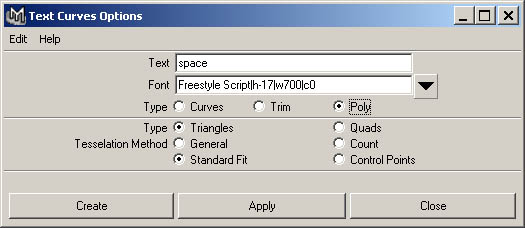
- Enter the Text in the Create Text Box and choose your options
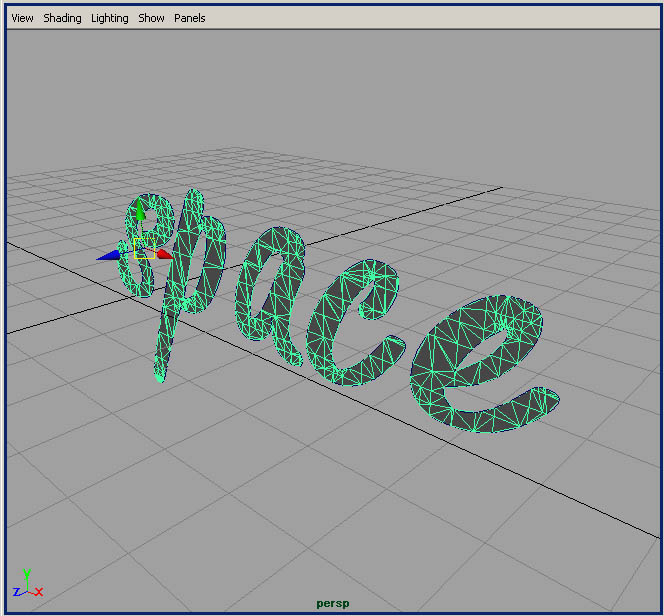
- Result
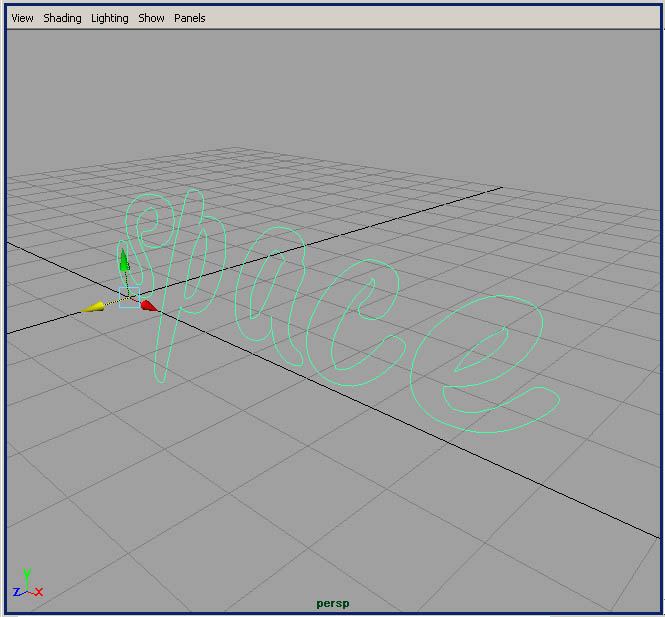
2) Understand the Details of Text (Curves only)
Text is represented by Composite-Objects (Curves) in MAYA. These curves are forming the edges (outline) of the given text. The curves themselves do not form renderable faces.
- Open again the text box:
This time only the curves defining the text are created

- Result
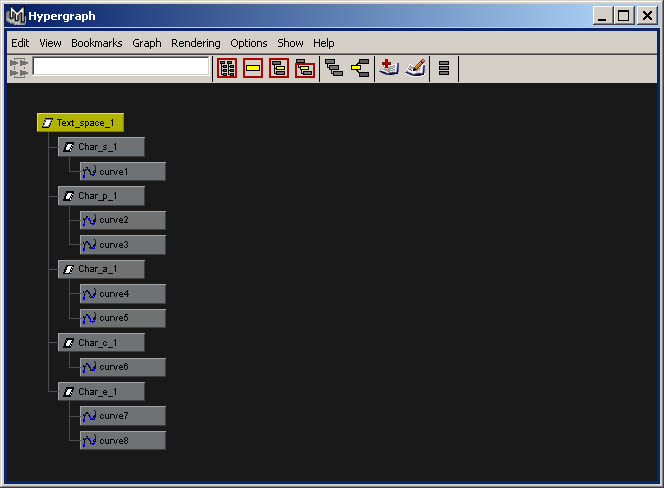
- Open the Hypergraph-Editor
The Hypergraph is a very powerful tool, that gives an abtract view to all the objects in the scene. It can be especially useful for selection of complex objects or parts of those objects.
- Hypergraph-Editor
- See the MEL-Scripting
textCurves -ch 0 -f "Freestyle Script|h-17|w700|c0" -t "space";
// Result: Text_space_1 //
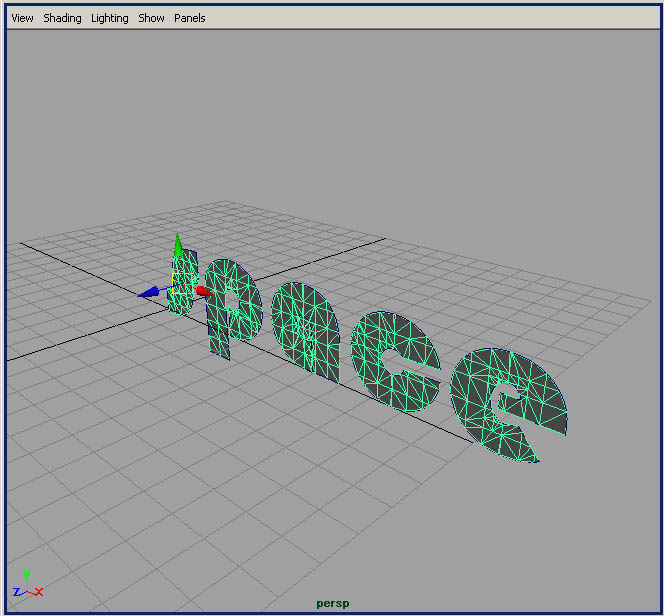
3) Understand the Details of Text (Curves and Polygons)
To get a solid text, chooose the "Poly" Option in the Create-Text-Box
- Open again the text box:
Choose the "Poly" and the "Standard Fit" Options
- Result
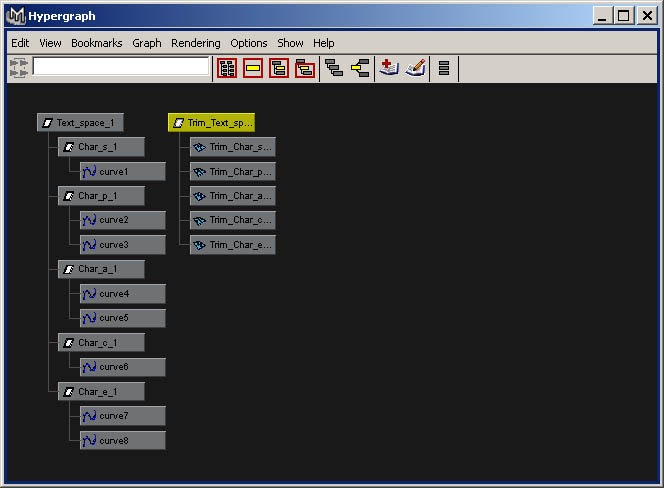
- Open the Hypergraph-Editor
This time there are two independed groups of objects. One Group are the curves, the other group consists of the polygon surfaces.
- See the MEL-Scripting
textCurves -ch 0 -f "Freestyle Script|h-17|w700|c0" -t "space";
// Result: Text_space_1 //
planarSrf -name "Trim Char_s_1 #" -ch 1 -tol 0.01 -o on -po 1 Char_s_1;
// Result: Trim_Char_s_1_1 planarTrimSurface1 //
planarSrf -name "Trim Char_p_1 #" -ch 1 -tol 0.01 -o on -po 1 Char_p_1;
// Result: Trim_Char_p_1_1 planarTrimSurface2 //
planarSrf -name "Trim Char_a_1 #" -ch 1 -tol 0.01 -o on -po 1 Char_a_1;
// Result: Trim_Char_a_1_1 planarTrimSurface3 //
planarSrf -name "Trim Char_c_1 #" -ch 1 -tol 0.01 -o on -po 1 Char_c_1;
// Result: Trim_Char_c_1_1 planarTrimSurface4 //
planarSrf -name "Trim Char_e_1 #" -ch 1 -tol 0.01 -o on -po 1 Char_e_1;
// Result: Trim_Char_e_1_1 planarTrimSurface5 //